Sunday, October 28, 2012

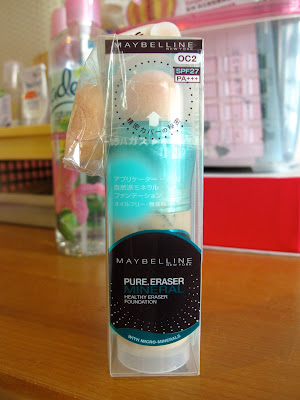
(Holy Grail Product) Review: Maybelline Pure Eraser Mineral Healthy Eraser Foundation

Ever since the beginning of the year, I needed a new liquid foundation. However, I hesitated when new ones were introduced to the market because I didn't want to spend my money on something that would probably break me out. So I relied on my Missha BB Cream and waited for the right one to be launched. 

The thing about BB Creams is that they are great, but not so great for unfortunate users with blemishes and acne-prone skin because the coverage is not that fantastic. Hence, I was piling up the concealer whenever I used BB Creams, which of course made my blemishes even more prominent. 

Then this magical foundation from Maybelline was launched. I watched the advertisement on TV and I was immediately sold. The Maybelline Pure Eraser Mineral Healthy Eraser Foundation is not a cheap foundation, especially for a drugstore one. It retails at S$27.90 at Watsons nationwide (or anywhere with a Maybelline counter). I do admit it's a hefty price tag for a Maybelline product. 

Any Malaysian/Indonesian readers here who knows if this foundation can be found in Malaysia/Indonesia? If yes, I'll definitely purchase my back-ups there! 


The number one feature that caught my attention was the packaging and the applicator. The Maybelline Pure Eraser Mineral Healthy Eraser Foundation is no ordinary foundation! It's a tube of product with a sponge-tip applicator at the top. Extremely innovative. You may wonder if it's hygienic to use a sponge-tip applicator for a liquid foundation. Luckily, Maybelline attached a non-bacterial sponge for this foundation. So yay, users can use this with less worry! 


The foundation promises:
  • buildable coverage (thin layers of product can be layered according to one's own fancy without masking the face!)
  • velvety finish (not matte, so it's not so harsh and you don't look obviously made up)
  • refreshing & light (nobody likes the cakey feeling, eh?)
  • moisturizing feel 


Ingredients list


I don't know what's up with this usage of white text. I can't even get it to appear on photos! =_=

So here are the instructions:
  1. For first time usage, turn the top for 10-20 times to dispense the foundation out. 
  2. Apply the foundation directly onto your cheeks, forehead, nose and chin using the sponge applicator.
  3. For subsequent usage, turn the top 1-2 times to dispense product. 
TIP:
To wash the sponge, gently pull the sponge tip out and wash under running water. When completely dry, put the sponge back. 


It comes with an additional sponge applicator too, so yay! 


Packaging: I love, love, LOVE the sponge applicator. This gives CONTROL a whole new definition. With usual foundations, you tend to pump out too much, and then you find yourselves in a dilemma of whether you want to use up all the foundation that you have pumped out, or waste it. Most of the time, I will choose the former, and I will end up looking like a walking theatrical mess. With this innovative applicator, I really can control the amount that I want to use on my face, and it's never too much! You dab the sponge on your face, you blend the foundation out, if you need more, you dab some more! You'll never ever ever use too much foundation with this product! AMAZING. 


Every time you turn the top, only a little bit of the product will be dispensed and it will be dispersed over the sponge. I really am digging this foundation, and I have been using it everyday and loving it every single day. 

3 dabs on the back of my hand. 

Foundation blended out
Coverage: This is a medium-heavy coverage foundation, perhaps verging on the heavy side. It's definitely more heavy-duty than your BB creams and I need much less concealer for my blemishes! 

Moisturizing: It's not greasy moisturizing, but just the correct amount of moisturizing. Especially good for oily skin actually because it gives you your needed amount of hydration without making you look like you just deep fried yourself a few hours later. 

Longevity: I used this foundation for a day out in Sentosa and then a Halloween night at Universal Studios Singapore. A total of 12 hours, and the foundation didn't budge, ARE YOU KIDDING ME?1 GREAT FOUNDATION! 

I didn't really take close-up photos of the foundation on my skin (sorry!), but here are some photos that perhaps will show you how amazing the Maybelline Pure Eraser Mineral Healthy Eraser Foundation is. :) 


This one's after about 10 hours. Still looking good! :)

Will I buy it again? I'm going to treat this foundation like an item that I will need during a war. STOCKING UP TIME. 

It's really a great liquid foundation for users with acne-prone skin and blemishes, go get them ALL (but leave some for me please).

Good job, Maybelline!
Monday, October 22, 2012

Review: Benefit SUGARlicious Lip & Cheek Kit

First of all, I have to thank my awesomeposum friend, Stufu, for this great birthday present! I have been wanting to try out Benefit items and this kit just has everything that I have been yearning to try! 

The Benefit SUGARlicious Lip & Cheek Kit retails for S$45 at any Benefit counters or at Sephora! :) 


The kit consists of:

  • a mini benetint (4ml)
  • a mini high beam (4ml)
  • a mini sugarbomb blush (3g)
  • a full size ultra plush sugarbomb lipgloss (6.5ml)
A perfect kit for anyone who wants to try out benefit products! They are wildly popular for their blushes and of course the benetint and high beam

There are two other lip & cheek kits available - feelin' DANDY (with posie tint, dandelion blush and dandelion lipgloss) and go TROPI-CORAL (with chacha tint, coralista blush and coralista lipgloss).


Packaging: How pretty is this packaging?! Yes it is quite bulky and boxy for a few small products but I really like how much effort they put into it! Argh, I forgot to take a picture of the gorgeously huge and excellent quality mirror! If you open up the TIPS and TRICKS booklet, it will reveal a glorious mirror. I'm in love with any palettes/kits that provide a sturdy mirror!

Also, benefit is quite clever eh? They used the TIPS and TRICKS booklet as a form of protection for the mirror as well. No more blush powders or accidental gloss smudges on the mirror! :D


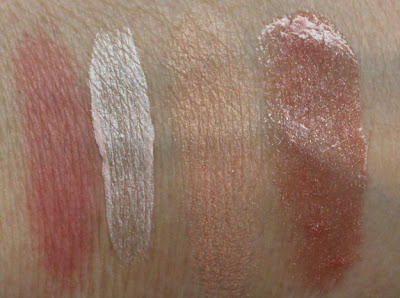
I was extremely intelligent and forgot to take photos of the product swatches. =_=. Therefore, I had to use one from the net and thank you so much Vampy Varnish for the photo! The link to her blogpost is captioned on the photo! :)

Photo credited to: Vampy Varnish
Benetint

Colour and Pigmentation: This is a really gorgeous rosey pink tint that's suitable for probably any skin tone! It's sheer but buildable and the liquid is not sticky at all (plus points!).

Fragrance: I'm in love with the fragrance. It's like sniffing in expensive rose perfume!

Overall: I definitely see why the benetint is such a popular product that has many raving reviews from people all over the country. I used it together with the Sugarbomb blush, and I looked naturally radiant and not purposely made up. FANTASTICO.

High Beam

Colour and Pigmentation: It's a highlighter with very subtle silver shimmers mixed in with the pinkish hued product. This product calls for a light-hand application. A little bit goes a long long long way.

Overall: Initially, I had some difficulty working with this product. I applied way too much! And so my upper cheekbones looked almost ready for a circus show. D: Lesson learnt and the second time I only dotted once on each side, and they were perfect.

Sugarbomb blush

Colour and Pigmentation: Such a unique blush with 4 triangles of blush shades. It's too cumbersome to try out each triangle at a time, so it's extremely advisable to just swirl all the shades together. It's almost reminiscent NARS Orgasm (perhaps with less shimmer and less orange tint). Pigmentation is great and it's not powdery at all!

Brush: I don't get the brush. :S It's like using a paintbrush to apply blush on my cheeks. TOO ROUGH. I'm going to ignore the brush and just use my soft ELF Studio one.

Overall: It's a great blush to use on its own, or when applied on top of a layer of benetint.

Sugarbomb lipgloss

Overall: I don't really like this lipgloss. For one, it's extremely sticky, and I really hate sticky lipglosses. Can you imagine having medium-length hair that's impossible to tie and then having them stuck on your lips while walking? NOT GOOD.

I really enjoyed this Sugarlicious Lip & Cheek Kit from Benefit! I'm quite sure benetint and high beam are going to be staples in my everyday makeup routine! :)

Sunday, October 21, 2012

Formspring linked!

I'm so forgetful when it comes to adding new widgets to my blog. Nevertheless, I finally did it! :D

You can now ask me any questions (beauty-related, fashion-related, whatever is good!) via my formspring and I'll try to attend to them within 24 hours! :)

Get started by typing your question at the box on the left! YAY!

Edited at 4pm - please leave a name! haha. If not I can't answer case-specific beauty/fashion-related questions! :)

Saturday, October 20, 2012

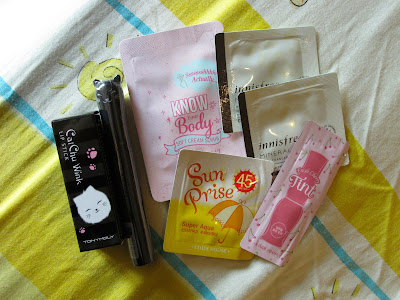
Qoo10 Haul: Skull Bracelets, Tony Moly CatChu Wink Lipstick and Tony Moly Cats Wink Mascara

I tried to put Qoo10 on a banned website list for my laptop. It didn't work because I ended up using the desktop at home to browse through the myriad of amazing things sold in that magical site. 

My logic works like this - if the items are way below their retail prices, then why not? 

This logic killed my savings, but it really did make me feel happy. So, I guess I have to choose between rich and sad, and poor and happy? What a joke, but hehe you get the point. 

I finally bought some skull bracelets for myself! Saw them on so many fashion blogs and many online sites sold them for exorbitant prices like US$20 each, or something absurd like that. Are you fucking kidding me?! I saw them on taobao.com for 1% of that price and from that moment on, I knew Qoo10 would have them sooner or later. THE WAIT PAID OFF. 

I bought the 3 skull bracelets for a total of S$7.50 (excluding shipping) from this store: http://list.qoo10.sg/gmkt.inc/Goods/Goods.aspx?goodscode=405363559


To continue my obsession with Korean cosmetics, I also bought some Tony Moly items (they will be reviewed soon! YAY!).

Tony Moly CatChu Wink Lipstick for S$6.50 at http://list.qoo10.sg/gmkt.inc/Goods/Goods.aspx?goodscode=406993448

and Tony Moly Cats Wink Mascara for S$5 at http://list.qoo10.sg/gmkt.inc/Goods/Goods.aspx?goodscode=407208353


I have tried the lipstick and I really love the colour! Time to review it very very soon!! :)


The mascara review will also be coming up!

OH QOO10 I LOVE YOU!! :D Give me a lifetime membership already! :D

Watsons Haul (new Maybelline Pure Eraser Mineral Foundation) and Lab Series free samples!

It has been a good week, in terms of hauling and acquiring new beauty and skincare items to review. My wallet is sobbing real hard though. 

I was highly interested in purchasing the new Maybelline Pure Eraser Mineral Foundation because the advertisements were too good! Of course, I couldn't leave Watsons with only the foundation right?

So here's the rest of the stuff that I bought!


ZA's Perfect Fit Two-Way Foundation Refill in PO20. I realised they reformulated and renumbered their products!


The Bio-Essence Bio Spring Water. Only S$2 each and I love spraying mists on my face after I apply makeup to make my face look less cakey!


My Seche Vite top coat is currently a blobby and gooey mess, so I desperately needed a new top coat! Decided to try this essence Sealing Top Coat. Only S$4.30!


I redeemed the Lab Series free samples through their facebook page (See post here) and they finally came yesterday! I am quite shocked at how much they actually gave out! Gonna pass these babies to my boyfriend! :)


Now time to do my readings!!!

Wednesday, October 17, 2012

Review: tokidoki Arte Palette in 24 Karat

This is another lucky find on sg-beauty! The tokidoki Arte Palette in 24 Karat retails for US$48, but I bought it for S$8. Amazing bargain! 

What pushed me into buying is of course the remarkably cute packaging! I have always loved tokidoki since it was created in 2005, but anything with a tokidoki print was always highly sought after, and hence pricey. Therefore, of course I had to get it at S$8! I don't really wear blue and silver eyeshadows (which are included in this palette), but I don't really care anymore because I just had to get it for the packaging! 


The compact palette consists of 4 eyeshadows (a shimmer white, a royal shimmer blue, a frosty silver and a matte black with some silver sparkle) and a dusty rose blush, as seen from photos below. 


Swatches taken with camera flash

Packaging: SIMPLY GREAT. I feel happy just by staring at it. I'm now even thinking of scouring the net for more of the Arte Palettes for collection purpose! Also, it's compact and really thin - definitely will fit into any makeup bag and will not add any significant weight to any bag!

Pigmentation: For a S$48 price-tag, I expect magical things, but sadly I think my high hopes were very much shattered. Pigmentation was so-so. The best performing shade was the royal blue colour. The white was chalky and the shimmer silver was quite chunky. The matte black shade was satisfactory, however it's not as black as some matte eyeshadows that I have (those are much cheaper too).

Application: I quite like the application process - there was minimal dropout, even with the matte black eyeshadow. The only irritating point is how difficult it is to blend out the white shade. I ended up with a white patch under my brow bone - NOT FLATTERING - but I guess I should have used a lighter hand?

Blush: I forgot to take a swatch of the blush, sorry for that D: I really like the blush! A little bit goes a long way and the colour sits prettily on my cheekbones. Just enough flush to make my entire face seem more alive!

Longevity: No qualms about this. The eyeshadows lasted a good 8 hours and the blush was still visible even after a long day in school.

Will I buy it again? Probably yes, just for the packaging. I'm searching high and low for bargains now! However, for S$48, I would probably hold back and print out the tokidoki print and paste it on my other palettes :S

Tuesday, October 16, 2012

Review: Calvin Klein Tempting Glance Intense Eyeshadow in 133 Golden Violet

In my mind, high end eyeshadows are not something that I hope to have in my make-up bag. I just don't feel the need to part with so much money for something that I won't use much. The matter's different when I see high end eyeshadows selling for cheap. VERY different. 

I chanced upon a livejournal that was getting rid of quite a number of high end beauty products, and as much as I wanted to get everything, my wallet had its limits. I ended up purchasing the Calvin Klein Tempting Glance Intense Eyeshadow in 133 Golden Violet for a mere S$8. BARGAIN. The eyeshadow retails for US$22. 


Ingredient List


Packaging: One of the sleekest and prettiest packaging around. The transparent rim opens up to a black interior and a really heavy duty mirror. It's simply packaging that's made to match the exorbitant price. Even the given eyeshadow sponge has a "ck" logo, so nope this is no cheapo product. Much thought was put into the packaging and I LOVE IT. Even carrying it around makes me somehow more ... taitai-like? :D

Swatches taken under camera flash

Colour: 133 Golden Violet is a really gorgeous purplish-pink base eyeshadow with lots of golden shimmers. The colour looks just purple in the pan, but after I brushed it on my eyelids, it turned into this really queer but pretty mauve colour. Under sunlight, I definitely can see the golden shimmers. I think the colour is verging on a duo-chrome formula, although that cannot be seen from the swatch above.

Pigmentation: Not the best pigmentation around. I expected much more since this is supposed to be a high end product. It takes me quite a few applications to achieve the colour-as-in-pan look. Hence, I'm not a happy camper when it comes to pigmentation.

Longevity: This was the part that surprised me the most. Usually when eyeshadows have moderate to poor pigmentation, the colour runs quite quickly and by the end of the day, you wonder where your eyeshadows disappear to. With the Calvin Klein Tempting Glance Intense Eyeshadow, I see no such problem at all! It was quite amazing how after a 10-hour day, the pretty mauve-purple colour was still obvious on my eyelids. Only the golden shimmers were getting lackluster.

Will I buy it again? At the moment no. Mainly because of the price tag. If I can find bargains, then why not? I just looked at the colour range and ohmygosh #119 Chanterelle is REALLY PRETTY.

Monday, October 15, 2012

Past outfits - featuring Cotton On brown boots (ADORBS MAX)

I cannot reiterate further how much I freaking love my brown boots from Cotton On. Out of the 7 days of the past week, I have worn them out for 6 days. Wearing them till their death and LOVING THEM. 


Monday's outfit:

Top: Qoo10
Shorts: Cotton On
Bag: H&M
Boots: Cotton On


Tuesday's outfit:

Top: stolen from mom's wardrobe
Shorts: Cotton On
Necklace: thrifted in HongKong
Boots: Cotton On
Bag: H&M


Wednesday's outfit:

Top: H&M
Skirt: Cotton On
Bag: GAP
Boots: Cotton On


Thursday's outfit: 

Top: thrifted in HongKong
Shorts: Forever 21
Bag: H&M
Boots: Cotton On


Crazy how much I have worn them out this week. I don't think I have ever done that before! I shall make this a habit.

Next week shall be DocMarts week! :D


Also, I'm freaking in love with my new Cotton On (YET AGAIN!!) purchase - this wicked pair of wedges for 10 bucks, a 49.90 reduction from its original price!

WOOHOO.

Problem is, they are 14cm high and I think I will be a walking hazard with them on. HMMMM. I WILL FIGURE SOMETHING OUT. :D


Friday, October 12, 2012

Food Hunt: VeganBurg @ The Grand Stand

Dinner dates are always something I look forward to. Singapore has so many great food stops and we decided to clear them slowly, a dinner date at a time. :D 

This time we tried VeganBurg @ The Grand Stand. The Grand Stand is the old Turf City and the entire building has now been revamped to house many unheard of restaurants. I think we are going back for North Indian food next Monday! :D 

Anyway, back to VeganBurg, I always wanted to try it but before this outlet was opened, VeganBurg was only available in the east, which is extremely far from my house. I even commented on its facebook page, pleading for an outlet in the west, and yay! They finally did just that! 

VeganBurg serves vegan food (duh!) and it's the place to go to get your fast food fix but still have it healthy. GREAT CONCEPT. 

And if you think vegan food tastes bad, THINK AGAIN. These guys here are magicians. Their "meat" patties are SO JUICY. Also, I prefer their buns than the normal sesame seed buns. I AM SO IN LOVE. 


Spinach ball thingies - I didn't fancy this because it tasted very doughy. And it wasn't very cheap as well.


Cracked Pepper Mayo Burger - This is extremely delicious. The patty is made up of a mixture of tofu and mushroom. I may not be accurate because I'm guessing while ploughing through that incredibly gorgeous burger.


Curry Rendang Burger - The sauce tasted like a refined version of satay sauce. Yums. This was a messy burger to eat, with juice dripping everywhere. But holy, HOW JUICY IS THE PATTY?! Completely in love and I'm going to suggest putting this on the permanent menu because I will order it EVERY SINGLE TIME.


Yes messy burger, and amazingly juicy vegan patty! NO MORE DRY BEEF PATTIES!


Best concept for fast-food ever. I'm going to eat here for so many more times in the future, I can feel another Curry Rendang goodness already!!!

*drooling*