I have always wanted to do a tutorial, but I was too self-conscious to do it because I figure my skills are not as honed as other make-up bloggers. BUTHEYHEY, I have finally mustered up the courage to try on one! Tell me what you guys think about it yeah! :) Been feeling rather lonely in the comments section. HAHA.
Tutorial: Everyday Neutral Look
First up, you need a good eyelid primer.
The reason for using a primer is to ensure that the eyeshadow sticks well to your eyelid, will not budge throughout the day, and make sure that there is minimal smudging and smearing a time goes by. Another reason is that sometimes certain eyeshadows appear brighter or their colours are much more vibrant when applied on a well-primed eyelid.
I'm using my fool-proof Urban Decay Eyeshadow Primer Potion for this look. This primer is great for those with oily lids!
Apply it evenly all over your eyelids.
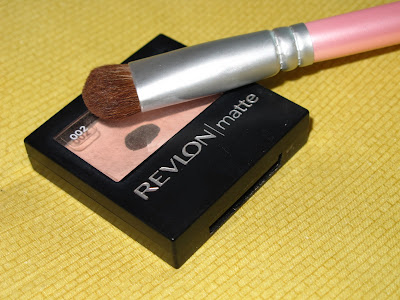
Next, you need a good matte skin-coloured eyeshadow and a large eyeshadow brush. I'm using Revlon Matte Eyeshadow in 002 and a Coastal Scents eyeshadow brush.
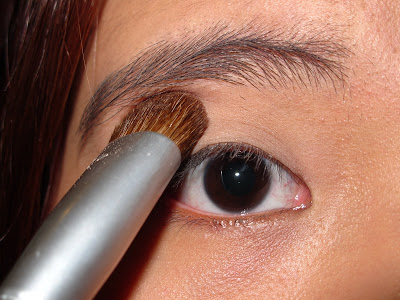
Apply the eyeshadow all over the lid, even until the browbone (the area directly below the end of your eyebrows).
The reason for applying this colour is to make eyeshadow blending an easier process. A lot of girls like to apply pretty colours on the eyelids but they don't realise/forgot that they have to blend the colours with a skin-tone colour to make the look more natural. Without blending, all you get is a harsh line between the colour and your skin, and this makes the entire look blotchy, untidy and simply ugly. SO PLEASE REMEMBER TO BLEND. CRUCIAL STEP WHICH I WILL DEMONSTRATE LATER ON.
Using a smaller and flatter eyeshadow brush, apply a gold-brown colour. I'm using Half-Baked from Urban Decay Naked Palette and a Coastal Scents eyeshadow brush.
Brush this colour all over the lid until below the crease (The crease is the line which gives you your double/multiple eyelids). Focus the colour mainly on the front and middle of the eyelid.
Using the same brush, apply a darker brown on the outer eyelid. I'm using Darkhorse from Urban Decay Naked Palette and the other side of the similar Coastal Scents brush.
Apply the colour, focusing on the middle and outer area of the eyelid. The method of application should be such that the darker colour will follow the shape of the eyebrow, but still applied under the crease. In a way, the line should be parallel to your eyebrow. Try to blend the 2 colours in the middle, so you will not have a harsh straight line in the middle of your eyelids.
And you will get this. Notice that there's an ugly harsh line between the eyeshadow colours and my own skin. THIS IS UNFORGIVEABLE. So you have to blend...
I go back to my Revlon Matte Eyeshadow in 002, together with ELF Studio Eye Contour Brush.
What I do is that I use the brush to lightly apply the colour on the empty area, and then after that, I blend them all together by using a slight pressure to bring the colours upwards. Use gentle upward motion strokes to blend them.
The result is a much more natural look. :)
Then use your favourite eyeliners; black for the upper lid and brown for the lower lid (brown is optional, you can just go with nothing on the lower lid). I'm using Urban Decay's 24/7 Glide-On Eye Pencil in Perversion and Bourbon.
First, draw a line across your lid, as near to your lashline as possible. Do not attempt a wing if you are still a beginner because once you screw that up, you screw the entire look up and you have to restart, which is a bummer.
How thick the eyeliner should be depends on your preference.
And then apply brown eyeliner on the lower lid, focusing on the outer and middle area. The reason for the brown eyeliner is to create a base for the eyeshadow colours that I'm going to apply on the lower lid; so that they won't budge throughout the day!
Using an eyeliner brush, or in this case ELF Concealer Brush, and the same colours that are on your upper eyelids, apply the colours on your lower eyelids.
Darkhorse on the outer to middle area of the lower lid...
... and Half-Baked on the inner corners.
One trick I always do is to apply a brighter, shimmery colours on my inner lower eyelids. By doing that, you make yourself look very much awake even when you are very very sleepy. It creates a brighter look and you look more alert, very good for deceiving parents/teachers/interviewers/etc.
And then use your favourite mascara to finish the look! I usually do 2 coats of CoverGirl Lash Blast Mascara for separation and lengthening of the lashes and then a coat of Maybelline Pulse Perfection Mascara for that much needed volume!
One trick to apply mascara: tilt your head up, look down and open your mouth. Looks pretty unglam, but works wonders!
The finished look!
I look like a smurf in the above picture because of my gigantic nose. HIAKHIAK.
Anyway, this tutorial is very much basic and no fancywancy effects, just simple in-your-face photos. Hope Jo Quek finds it useful and hope nobody laughed at my untrimmed eyebrows. :D


1 comment:
'THIS IS UNFORGIVEABLE'
hahahahahhahahahhaha, LMAO =D
Post a Comment